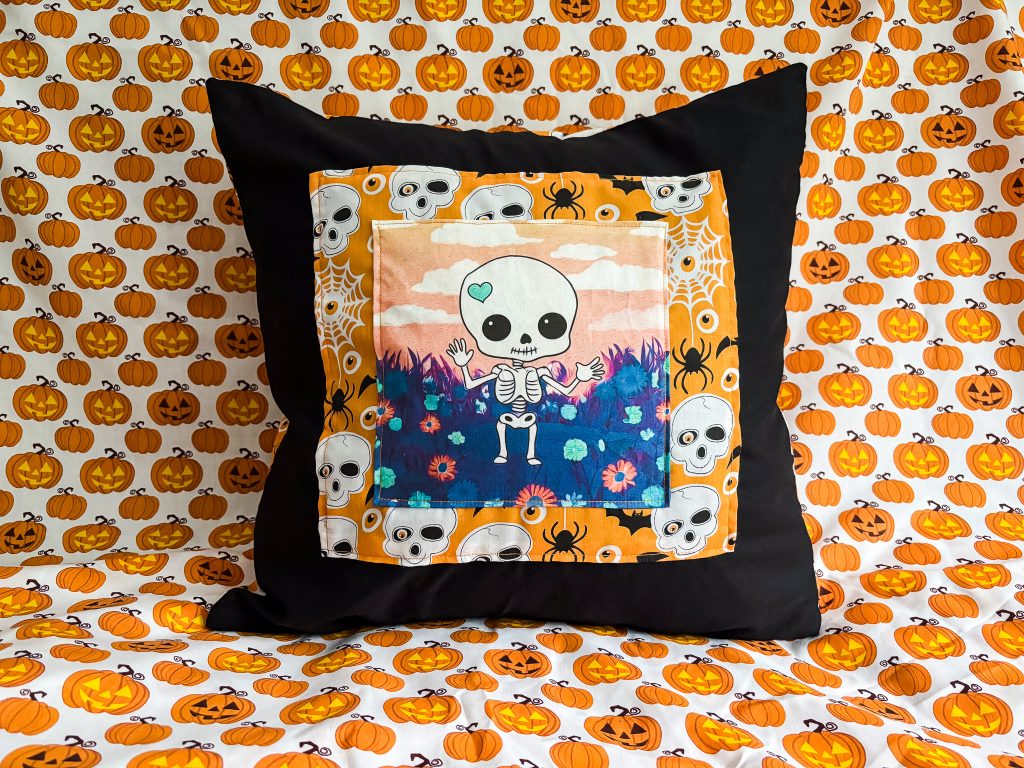
Have you ever wanted to bring your own artwork to life on fabric? Recently, I took on a fun and creative project designing and printing my own custom fabric at home — featuring a quirky cartoon skeleton with an oil painting style. I then used this printed fabric to make a cosy appliqué cushion that’s a personal and artistic touch to my home décor.
If you’re curious about how to print fabric at home and turn your digital designs into unique sewing projects, here’s a step-by-step guide to help you get started!
Step 1: Designing Your Artwork for Fabric Printing at Home
The first step is creating a design you’re excited to see on fabric. I used Procreate on my iPad to create a cartoon skeleton then imported into photoshop to enhance and add an oil painting effect.
When designing for home fabric printing, keep these tips in mind:
- Create your artwork at a high resolution (at least 300 dpi) to ensure sharp prints.
- Think about the size of your design relative to your project — too small and details get lost, too large and it might overpower your fabric.
- Save your design as a PNG file with a transparent background to keep the print crisp and clean.

Step 2: Choosing Fabric and Supplies for Printing Fabric at Home
Cotton fabric is ideal for printing at home because it’s soft, durable, and holds ink well. For my project, I used special printable cotton fabric sheets designed for inkjet printers, which you can buy online or at craft shops.
I purchased mine through Amazon, which you can find here
You can choose to print fabric at home yourself or use professional fabric printing services depending on your needs.
Step 3: Printing Your Fabric at Home
Before printing, I did a test print on ordinary paper to make sure colours and size were just right. Then I loaded the printable cotton fabric sheet into my inkjet printer, making sure the printable side faced upwards.
I selected the highest print quality settings to capture the details of my cartoon skeleton. After printing, I let the fabric dry completely to prevent smudging. Some printable fabric sheets recommend heat setting the ink with an iron — definitely follow those instructions for a durable finish.
Step 4: Preparing the Printed Fabric for Appliqué
After printing, I carefully cut out the skeleton design. To add stability, I fused a lightweight interfacing to the back — this helps when sewing appliqué pieces onto cushions or other projects.
Step 5: Appliquéing Your Printed Fabric Onto a Cushion
Next, I positioned my printed fabric on the cushion cover and pinned it in place. Using a zigzag stitch on my sewing machine, I carefully stitched around the edges to secure the appliqué.
A helpful tip for neat appliqué sewing is to slow down on curves and corners. If you prefer, you can hand stitch for a more handcrafted look.
Final Thoughts on Printing Fabric at Home
Printing your own fabric at home is an incredible way to bring your artwork to life and add a unique touch to your sewing projects. From digital design in Procreate to a finished appliqué cushion, it’s a rewarding process that anyone can try.
If you want to experiment with printing fabric at home, I encourage you to dive in and create your own personalised textiles.
