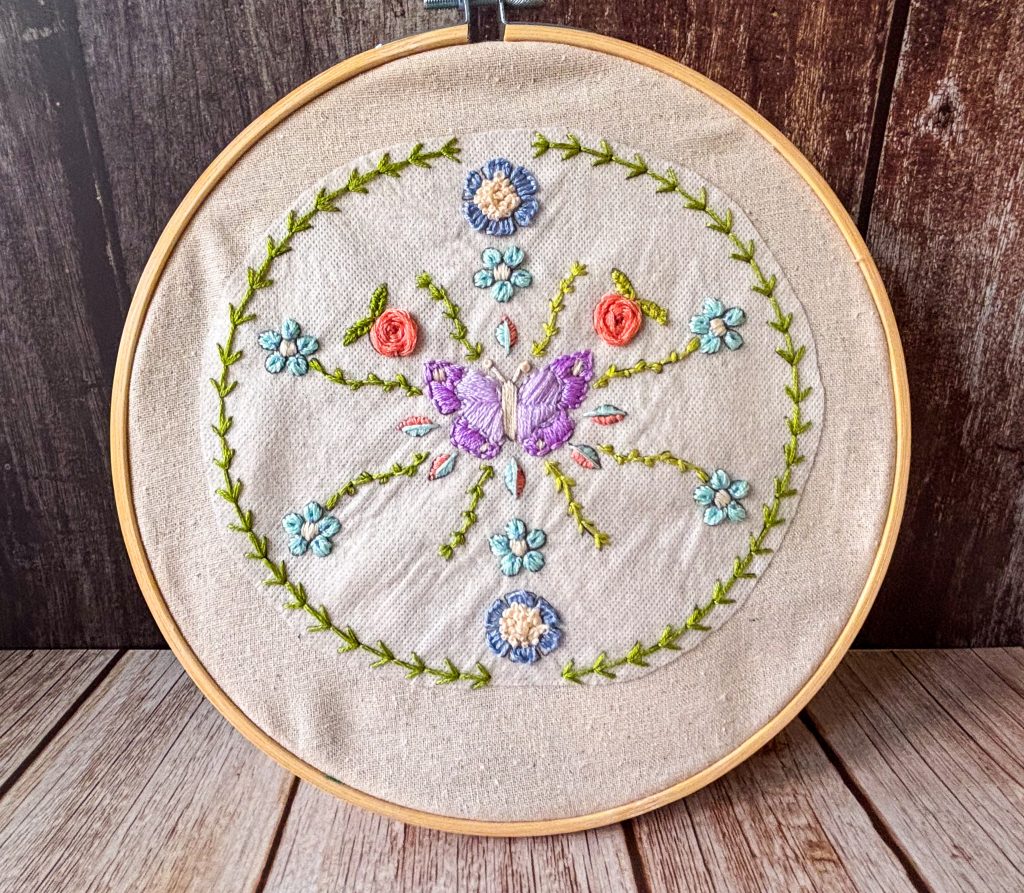
If you’ve ever wanted to add adorable little roses or fluffy textured dots to your embroidery, the woven wheel stitch is your new best friend. It looks fancy, but trust me—it’s super beginner-friendly and incredibly satisfying to stitch.
In this tutorial, I’ll walk you through the woven wheel stitch step by step with photos (because we all love a visual guide!). Whether you’re adding flowers to a hoop art piece or just experimenting with textures, this stitch is a fun one to master—and I’ll show you how to make it extra special by using two thread colors for a dreamy dual-tone look.
Psst! I’m using one of my own stick and stitch patterns in this tutorial—if you want to try it yourself, check out my designs over on Etsy! More on that below. 👇
What You’ll Need:
- Embroidery hoop
- Fabric (cotton or linen works great)
- Embroidery floss (2 colors)
- Embroidery needle (with a big enough eye for your floss)
- Fabric marker or pencil (optional if you’re using a pattern)
- Stick and stitch pattern (optional but fun!)
- Scissors
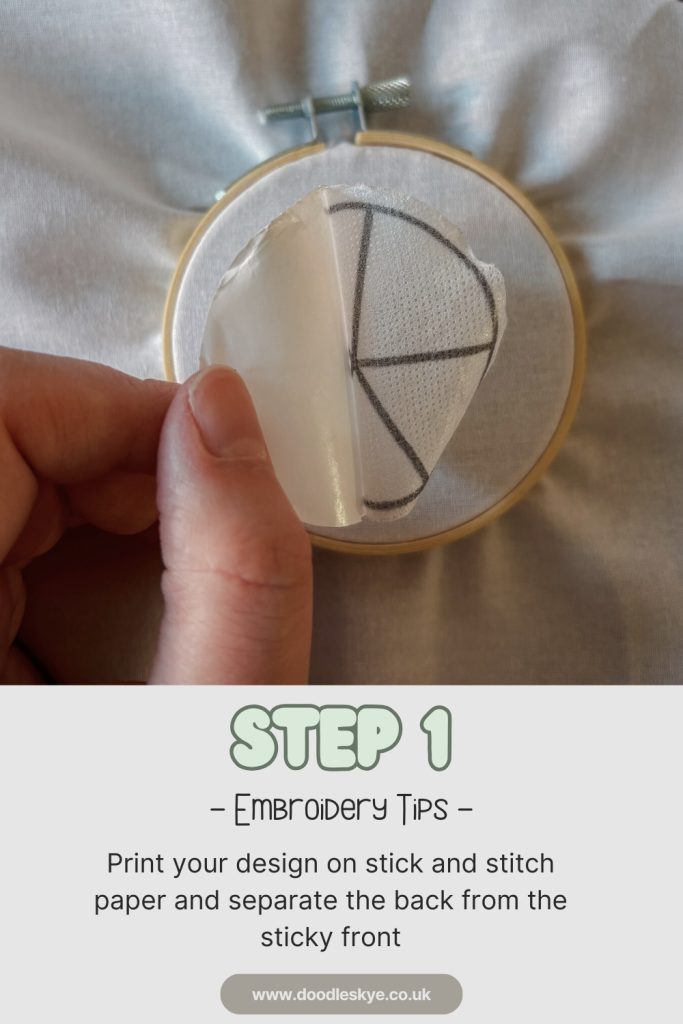
1. Apply your stick and stitch pattern or draw a small circle.
If you’re using a stick and stitch (like I am!), simply print and peel. If not, draw a small guide circle with a fabric-safe pen.
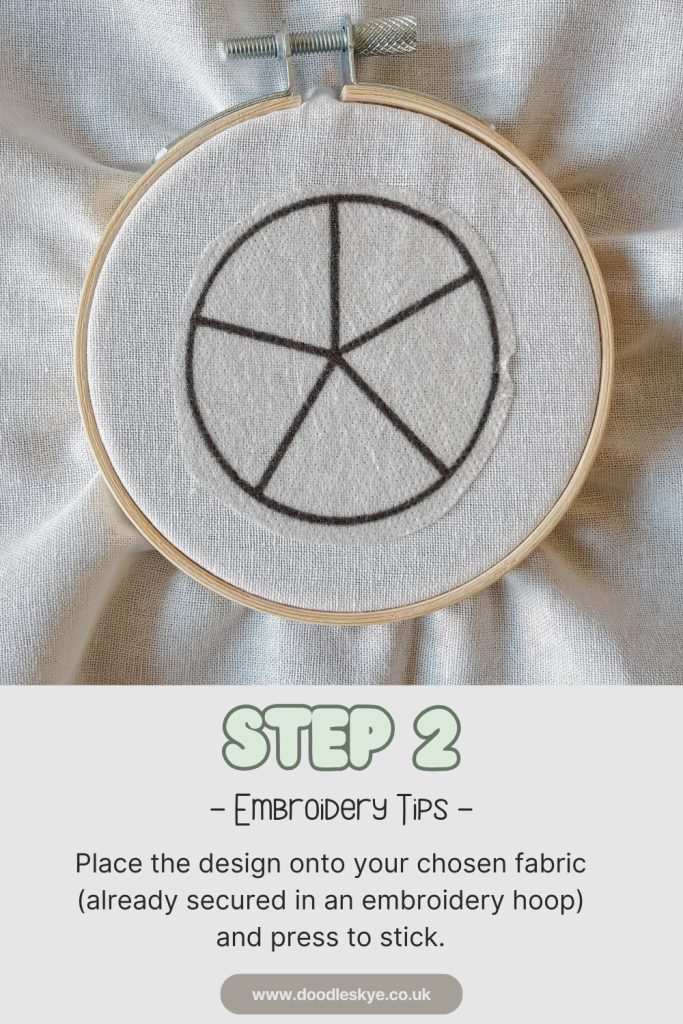
2. Place Design on fabric
Place the design onto your chosen fabric (already secured in an embroidery hoop) and press to stick.
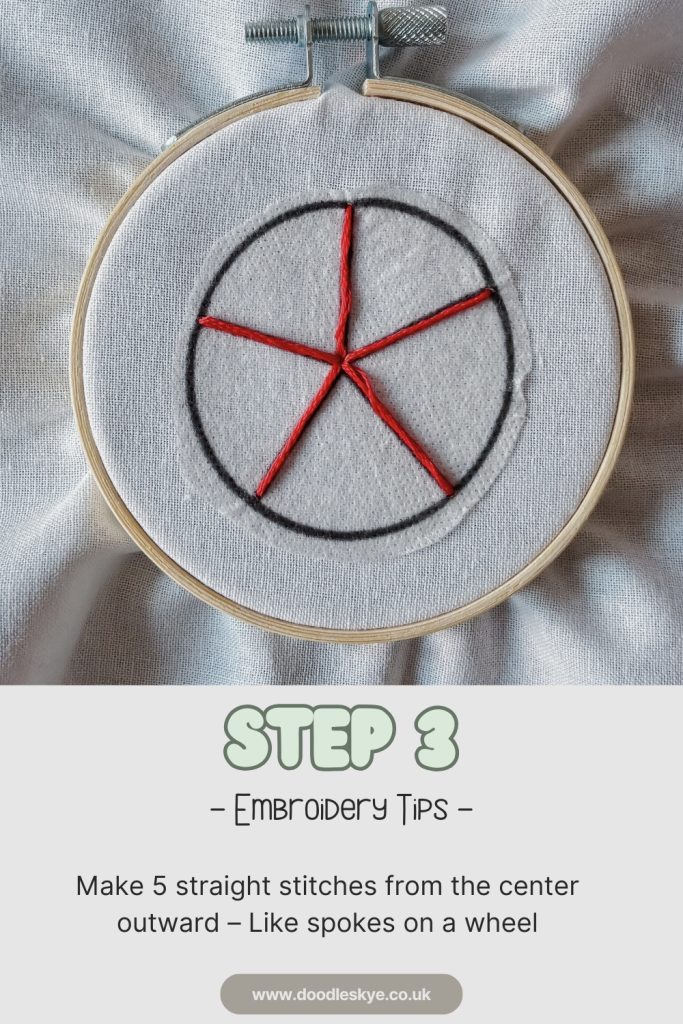
3. Stitch five straight lines like a star.
Bring your needle up in the centre and make five evenly spaced stitches outward—these are your spokes.
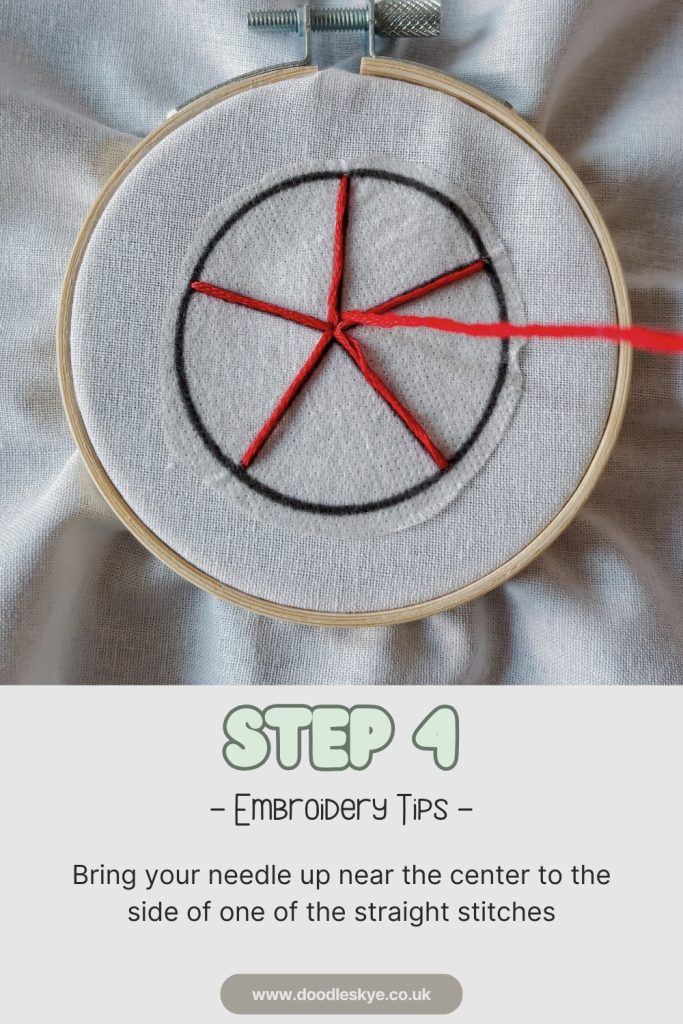
4. Bring your needle up beside the centre
Bring your needle up near the centre to the side of one of the straight stitches
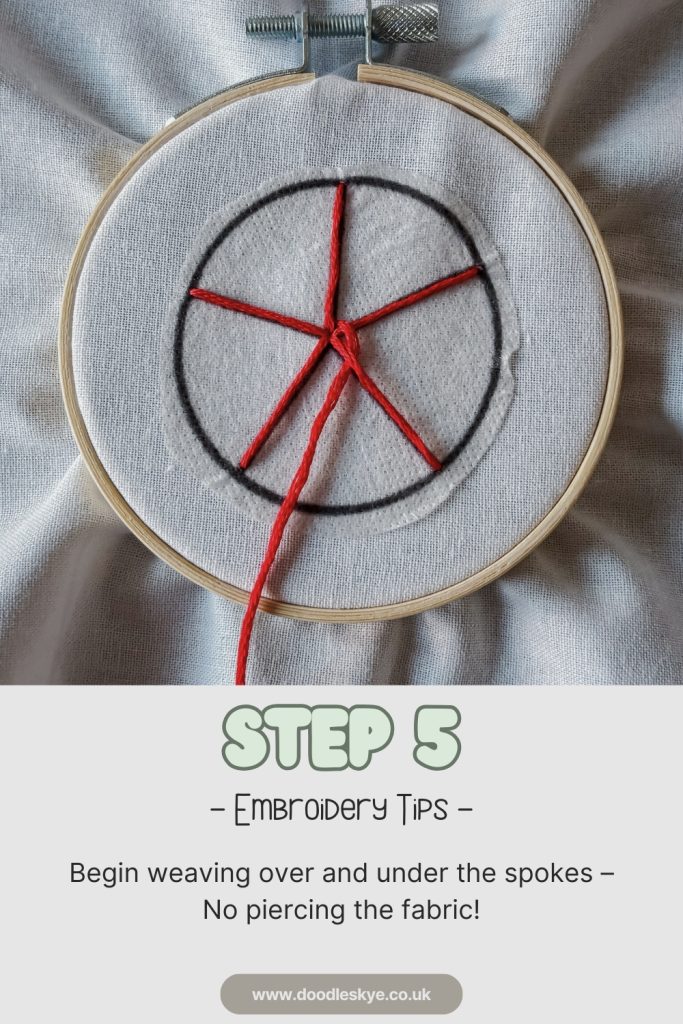
5. Start weaving: over one spoke, under the next.
Continue in a spiral motion. It’s kind of meditative—just over, under, over, under…
6. Keep weaving in a spiral pattern.
Work gently outward, nudging the thread as you go to create a full, fluffy flower.

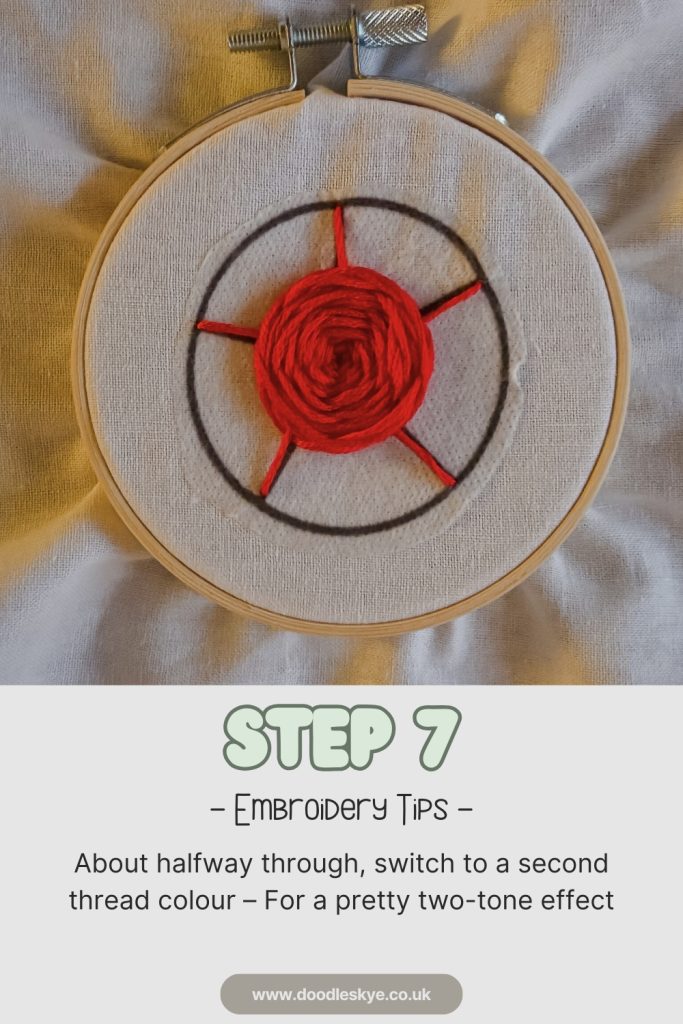
7. Switch thread colours halfway through.
When your flower is about halfway done, end your first colour at the back. Bring in your second thread and continue the same weaving pattern for a beautiful colour change.
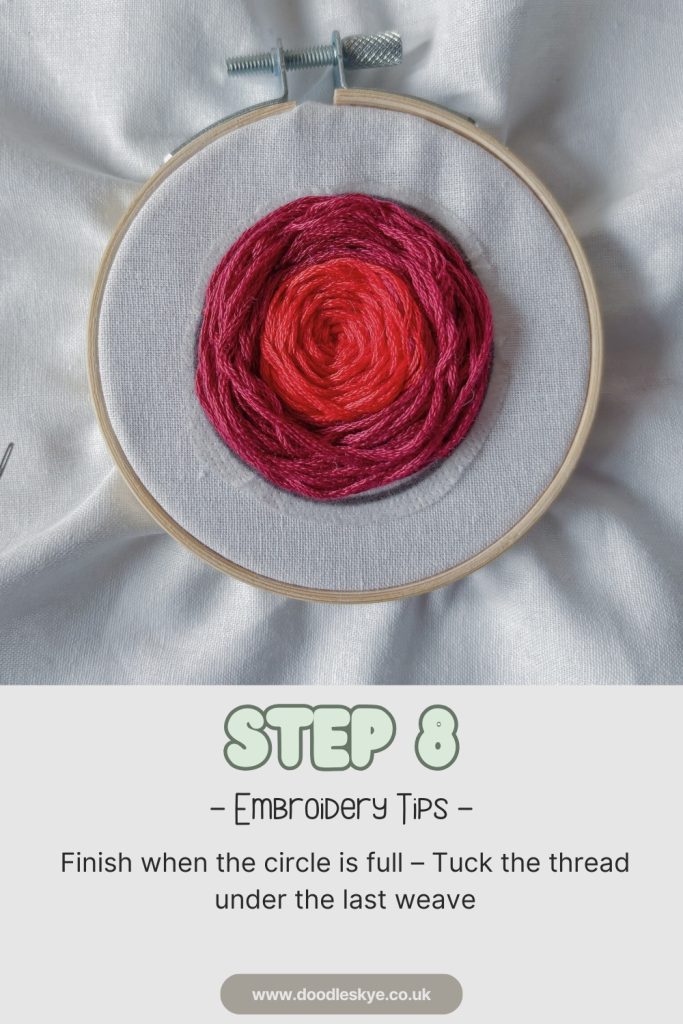
8. Finish when the circle is filled.
Tuck the last bit of thread underneath the back of your weave and trim. You’re done!
✨ About My Stick and Stitch Patterns:
All the photos in this tutorial use one of my stick and stitch patterns, which you can find in my Etsy shop. They’re perfect for beginners or anyone who loves the ease of peel, stick, and stitch. Each design is printed on water-soluble stabiliser—just rinse when you’re done stitching and your fabric looks clean and polished.
I design each pattern with lots of love (and lots of coffee), and I include simple instructions so you can relax and enjoy the process.
Tips & Variations:
- Color Blending: Try switching colors at different points for unique petal blends.
- Thread Variety: Use pearl cotton for a shinier finish or blend a metallic thread for sparkle.
- Spoke Count: Try 7 or 9 spokes for different effects (odd numbers work best for weaving).
The woven wheel stitch is like a little embroidery hug—relaxing, beautiful, and surprisingly easy to master. And if you’re looking to try it with a pattern that takes the guesswork out, I’ve got you covered in my Etsy shop.
Let me know how your stitching goes—and feel free to tag me if you share your work online. I love seeing how everyone adds their own style!
Before you go don’t forget to check out my other embroidery guides for more floral fun—from lazy daisy loops to satin stitch blooms. There’s a whole garden waiting for you!
Happy stitching!